Well it has been a while since I posted anything on here, and there are several good reasons for that. One, last week was spring break, and it was beautiful. I did a lot of stuff outside and never really touched my computer. Two, right before spring break I managed to break my Arduino again. Here's how.
As I have mentioned I got an ATtiny85 to play around with. I thought it would be a natural next step to start doing stuff with just the bare chip. I am by no means an expert in such things and thus went searching for someone else's work that I could shamelessly copy in the name of education. I found this website
HERE and began to follow their instructions.

Now to program these chips you need an external programmer. Being a college student and not having a whole lot of money that I just long to spend, I decided to go with the Arduino as ISP route. Well you can go to the website if you don't know what that entails, but to the right there's a picture to give you a general idea. Basically you are piggybacking off of the Arduino's programmer.
This went great! I plugged in all the wires based off of the charts on the high-low tech page, followed the rest of the instructions, and clicked go. Off the races I went, loading blink. I unplugged everything but the power and ground and got a blinking light! Yay!
Now that's cool. I plugged the wires back in and loaded fade. Error. Try again. Error. Sigh.
Now I unplug everything and try to load blink onto the arduino. It took forever to try to upload. Error. I believe it was something like the one below. Its funny that I saw it so many times but never actually copied it down.
avrdude: stk500v2_ReceiveMessage(): timeout
avrdude: stk500v2_getsync(): timeout communicating with programmer
Then I got thouroughly depressed and didn't touch it for a few days. Later I began trying to fix it.
Attempt 1: The reset doesn't appear to be working. Google such things. Nothing. Manual reset with a resistor on reset pin. Nothing. I hope this isn't the problem.
Attempt 2: Somehow I decided it might be the ATmega16U2 firmware (the smaller chip near the usb port). Download necessary stuff and reflash it. This took a while for me to figure out, but I finally did it. Successful firmware update, but no results. I never found a good tutorial on how to do this on a Mega, so I will post one later based on what I learned next time.
Attempt 3: Re-download Arduino IDE. Yes, this should have been my first step, but for various reasons it was not. Well this did not fix it either, but then a few days ago I notice that there was a new version 1.0.4. The release notes yielded this, "Fixed a bunch of bugs on Mega2560's bootloader (Mark Sproul)." Bingo I think. My problems are solved.
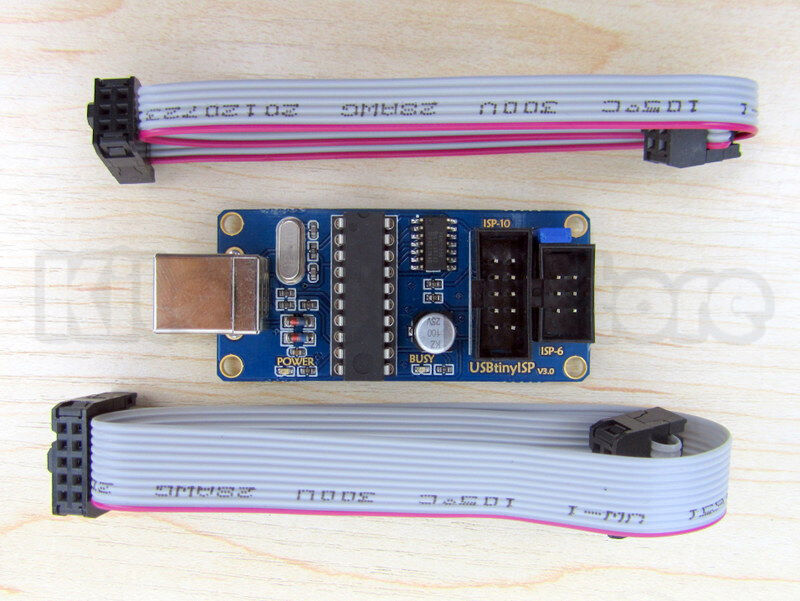
Well to upload the bootloader I needed a programmer. So now I bought what I should have bought in the first place, a usbtinyisp. I got mine off eBay from a US seller for $15 I think. You can also get kits
HERE. There's a picture if you're wondering.
I uploaded the bootloader (go
HERE for now). I may do a tutorial on this later too. Who knows. Anyway, I upload the bootloader and it appears to go well until I get an error message. It didn't work. However, I notice that the led is blinking on the Arduino. That's odd. Before it was just on all the time. It wouldn't blink even if I pushed the reset button. I plugged in the USB cable to the Arduino, and its alive again.
I have no idea what the problem was or what fixed it, but it now works again. The moral of this story (for me anyway) is spend the $15 and get an isp. $15 could have saved me many hours. Then again, I learned a lot through this process. I learned a lot about flashing firmware, loading bootloaders, and maintaining patience.
There will be more posts to come now. I hope this helped someone.
Matthew
