Saturday, December 27, 2014

Linearizing the Sharp IR Ranger (2YOA21) with an Arduino

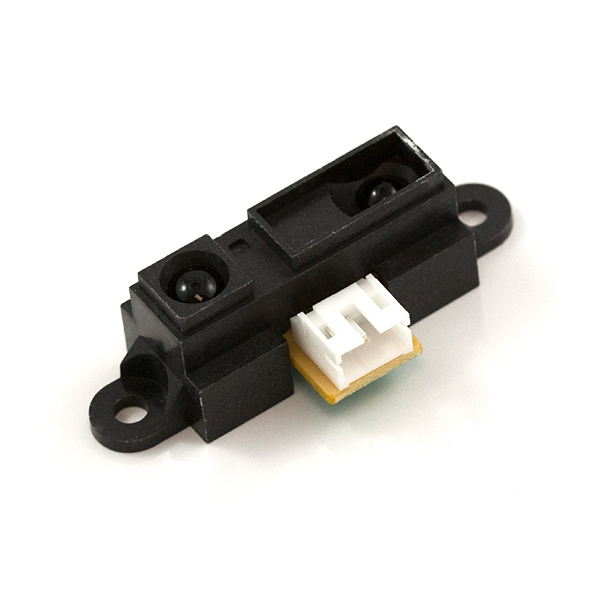
Today I will be linearizing a Sharp IR Ranger. More specifically, I will be using the Sharp 2YOA21 F 04.


First, a quick word on why we would want to do this. The Sharp ir rangers are a very effective means of measuring distance. While ultrasonic sensors (for more about those see the Sensors label) can be fooled by textures and echos, ir sensors are more susceptible to interference from outside light sources and changes in material reflectivity. Therefore,  if a cheap measurement system is required in a varying environment (eg, a mobile robot) a combination of ultrasonic rangers and ir rangers can be quite effective.

If you have found this page, you probably already know this, but I will state it anyway. Sharp ir sensors have an analog output. However, the analog value does not have a linear relationship to distance. In this exercise we will find the function that does relate the two and use that to take an analog value and convert it to a distance.

Wiring

As stated above, the sensor has an analog output. Connect the red lead to +5V, black lead to GND, and yellow lead to A0.

Aquire Data


I used a simple sketch that took the average of 5 values and printed it to the screen. I then manually copied it into an excel spreadsheet along with the measured distance value. 


Fit Data

Once you have acquired the data, plot it. Some points will most likely fall outside of the trend. Exclude those points and fit the rest. My fit was Value = 1893.9*Distance^-0.92. 



Use Equation

Solving the equation I got above for Distance gets me this, Distance = (1893.9*Value) ^-1.087.

This is something we can plug into Arduino code. At this point it is only right to note that the method I am using will involve floating point math. There are methods that avoid that. If processing power is at a premium, you might want to check those out.

The important piece of code looks like this:


  float Distance = pow((sensorValue / 1893.9), -1.087); 

If you want the whole thing, you can download my code HERE.

That's all I have. I hope it was useful.

-Matthew


Saturday, May 3, 2014

Delaying Startup Programs Until Idle on Windows 7

The other day I was starting up my computer in a rush before class. As I waited for all the "necessary" startup programs to start up, it hit me. Wouldn't it be great to be able to a prioritize the way my computer starts up? More than that though, I want to be able to tell some programs to not launch until my computer isn't being used. They can load up after I leave for class. If I need them I can just launch them manually.

A few Google searches yielded a few programs (some free some not), but I am always hesitant to hand over important things like startup procedures to an unknown program from the abyss. Then I found my answer.

Enter Window Task Scheduler. I had encountered Windows Task Scheduler before on Windows 8 but hadn't ever directly used it on Windows 7. It does exactly what I wanted! Using the task scheduler it is pretty trivial to create a task to start a program after startup and whenever the computer is idle. However, I thought I could make it easier.

I decided to create a batch file to launch my secondary programs (KeePass, iTunes updater, etc.). Then all I have to do is create one scheduled event in the task scheduler to launch the batch file. Even better, I can put the batch file somewhere convenient (the desktop, documents, etc), so it is easy to change. If you're reading this, I will assume you know how to find the startup programs you have on your computer. Make sure you don't get delay an important one.

Anyway, here is the batch file code. The best way to see what is going on is to just open a command window and type HELP START. This will give you all the commands you need. Note that if you are using a location that has spaces you will need to put it in quotes with a /D preceding it.

@ECHO OFF

START /B /D C:\Users\Matthew\AppData\Local\Google\Update\GoogleUpdate.exe
START "Startup Batch Window"  /B  /D "C:\ProgramFiles(x86)\Seagate\SeagateDashboard2.0\DBAgent.exe"
START "Startup Batch Window"  /B  /D  "C:\ProgramFiles(x86)\KeePassPasswordSafe2\KeePass.exe" 


And here are some screenshots of me making my scheduled event.
Create New Task


Adding a Trigger

Triggers for My Event

Adding Action to be Triggered - Launch Batch File


Hopefully this is useful to someone. As my Calculus II professor always said, "What is that American expression? There is more than one way to skin the cat?" If I missed a much easier, more effecient, or more logical one feel free to comment. This just seems to work for me.

-Matthew

Monday, April 14, 2014

Cheap Drill Batteries! Making a Corded Cordless Drill

This was a quick afternoon project that I worked on a few weeks ago. The beginnings were pretty simple. I was digging through the basement and found an old 12v cordless drill whose batteries had died. Being me, I decided that it would be cool and pretty easy to connect a cord to it and plug it into a lab power supply or other 12V source.


As this project is pretty dependent on the type of drill you have, I will try to include what pictures I took. Also, it is worth noting that as I type this Walmart has plenty of decent corded and even cordless drills for less than $40.

Step 1)
Take apart the battery. Determine the positive and negative leads. On mine white = negative,  black = positive (similar to wiring a house).


Step 2)
Aquire a cord. The wire I scavenged is suspected to have come off of an old vacuum. I would recommend scavenging for this project to keep costs down. I also found some banana plugs to make it easier to connect to a power supply. I considered using some old test lead alligators.

The kind of Banana Jack I used

Step 3)
Remove the batteries and wire together. I actually left some of the batteries in the casing to add some counterbalance. I then soldered on the wire, punched a hole in the case to let the wire out, and hot glued everything together.

Step 4)
Test. My next step was to hook it up to a car battery and test it. It worked! for a few seconds. Then the burnt smell.

The drill did not like being run on a car battery. There is a large diode inside the drill that I burnt out. Luckily, I found a replacement in a box of old hairdryers that we happened to have on hand.

With the replacement diode in, I took it over to a lab and tried it out. It worked fine. There was still a slight burning smell, but I suspect that may just be dust in the motor from years of non use. Overall it seemed to work ok. The video below will give you a peak at the power supply readout during testing.


Some might call this a wasted Saturday afternoon, and they are probably right. However, if you enjoy tinkering with things, making a corded cordless drill might be right up your alley.

-Matthew